| The Voyage of INTREPID | |
| "Making the Stem" | |||
|
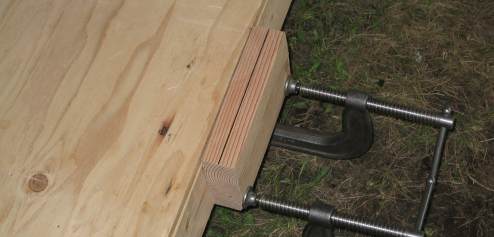
The stem is a short little 5-inch piece of wood about 1 ½-inches deep that is cut on a bevel to join the sides of the boat together at the bow. The plans call for an 18 degree bevel each side of center. I drew a strong centerline on a block of fir, and clamped the block to the side of my building table.
The Skill saw's base is tilted over to 18 degrees. Each hash mark is equal to 5 degrees. The alignment pointer is not visible from this view, but it is underneath that shiny nut at the front of the saw.
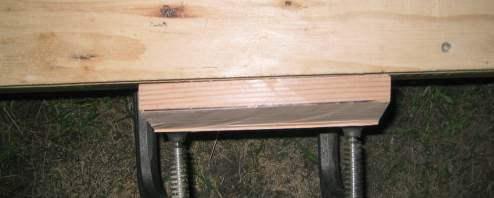
One lop done, one to go. I just turned the block around and re clamped it to the table.
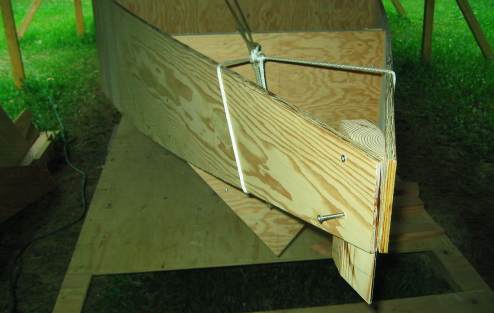
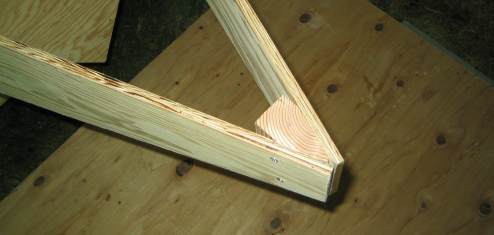
Getting a test fit of the stem, which includes screwing it into place. Note how the sides were bent in: a looped rope was placed around the two sides and moved back to bring the sides in. The rope is tied off on Bulkhead 4. The plywood is so flexible that the sides can be brought together by hand. No Spanish windlass required.
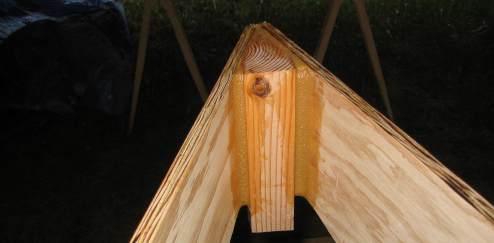
This is the final fit of the stem to the bow. The stem was left a little deeper than in the plans as I wanted to put the screws through the thicker section in the rear.
You can see the nice fit achieved just using a Skill saw, a plane, and some sandpaper. I plan to fill in the gaps on either side of the stem with epoxy putty.
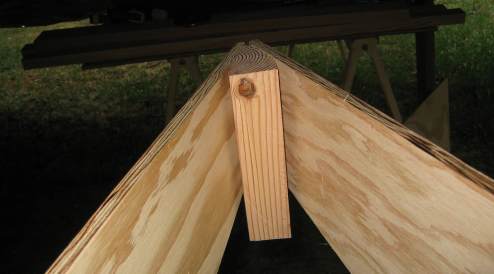
The front of the bow will get some epoxy putty and some fiberglass. The stem was left long as per the plans, to be trimmed to size later.
The stem is the last of the "framing stations" to be permanently affixed. I measured out an appropriate amount of epoxy to which I added a couple of teaspoon
fulls of pine flour. I believe that this will help with the epoxy's gap filling properties. It can still be painted on, but it is not as runny as epoxy alone, and it
will set up in a thicker coating without running off a vertical surface.
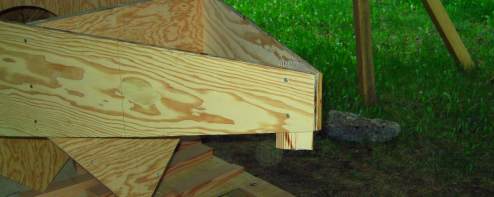
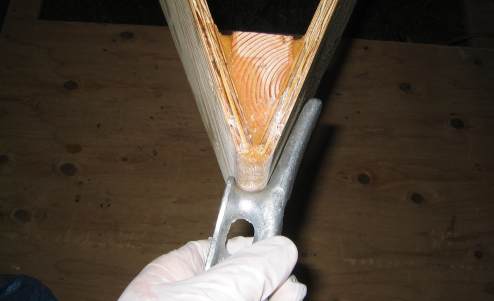
I took the leftover epoxy and mixed in 3 or 4 more teaspoons of pine flour to make a putty-like mixture. This was then pressed into the two small gaps on either side of the back of the stem, and smoothed to the appropriate gentle curve shape with a tongue depressor.
The epoxy putty was also gooped on the front of the stem, where the two plywood sides come together. This was to be a concave curve, so I had to find something with an inside curve. I found that part of my main anchor cleat's profile was the ideal shape.
I was left with a perfect rounded over bead of putty at the front of the stem. A little cleanup on the edges and a light sanding when it dries prepares it for some fiberglass tape.
|