| The Voyage of INTREPID | |
| "Building Table" | |||
|
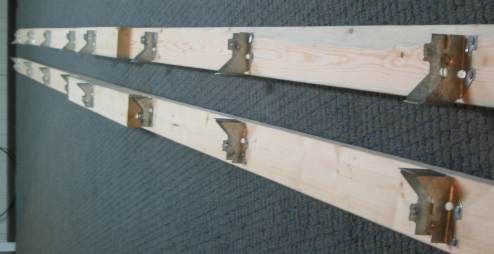
Traditionally, small home built boats are built upside down on a building jig. The jig holds the boat's frames in place while stringers and planking are attached. Taped seamed boats like the Dorado don't need a jig. Precut plywood panels are bent into place around bulkheads and then fiberglassed together to their final shape. While my boat could be built on any level surface, the only place available to me is my backyard. Instead of building directly on the grass, I will make a table to build upon. Since the boat is to be 18-feet long, I decided to make the building table 20-feet long by 4-feet wide. I used two 10-foot 2 by 4's end-to-end joined in the middle by a short 2 by 4. I attached joist hangers every few feet.
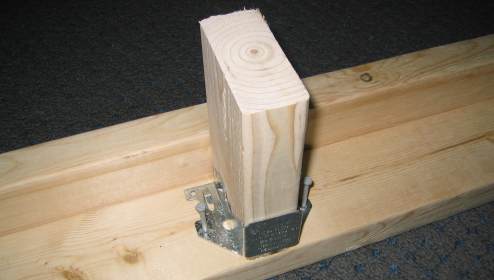
I used a piece of 2 by 4 to help position the joist hangers. The joist hangers have to be positioned so that the 2 by 4 is flush with the top of the frame rail. This picture shows both rails placed side-by-side so that I could be sure that the hangers were even with each other. If you construct the rails side-by-side like I did, make sure to position the joist hangers as mirror images of each other so that everything lines up. I found out that there are short, fat, galvanized nails specifically designed to be used with joist hangers. They are called joist hanger nails. Who would have thought.
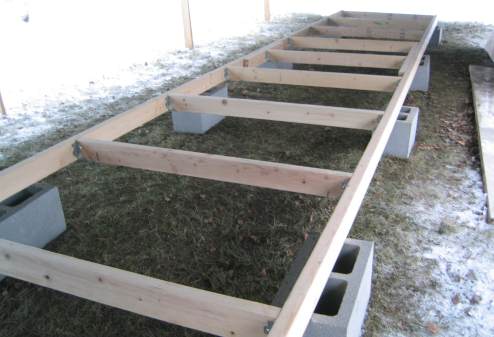
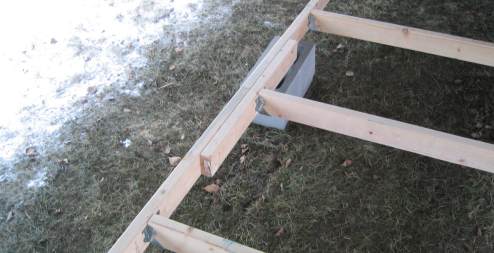
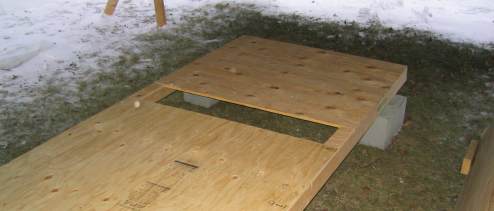
The frame rails were joined together with joists cut so the total width was 4-feet. The completed frame was put atop cinder blocks to get it up off the ground. I expect the frame will see about 700 pounds of weight spread across it -- the boat's, tool's, and mine combined.
This picture shows the join detail of the 10-footers and the joists.
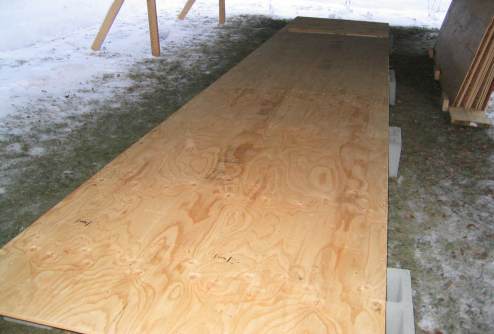
The frame was surfaced with ½ inch CDX (that ugly stuff you saw a few pages back.) I only purchased two sheets this size, so I placed them at the beginning of the table, covering the first 16-feet. I filled in the four-foot gap at the other end with a piece of scrap three-foot length plywood that I snagged from work. [ I asked the supervisor from whose department the wood came from If I could have it. She was reluctant to part with the piece because we use that type in our warehousing operation. She did add that if her boss approved, I could have it. When I asked him, he said I could have it as long as the supervisor whose department it came from did not object. Now, I am certain that when you have two authorities deferring to each other, the answer is...yes ! We learn that from our childhood, right ? ]
That three-foot piece of plywood left a one-foot gap in the table. I did not mind as at this end I felt that the bow of the boat would be up in the air. I still wanted to clamp my marine plywood sheets to the table for cutting, drawing, etc. with support from the full length of the table. I cut additional scrap plywood just to fill in the gap along the frame rails. So I saved twenty bucks by not having to buy another sheet of cheap CDX.
|