| The Voyage of INTREPID | |
| "Bottom" | |||
|
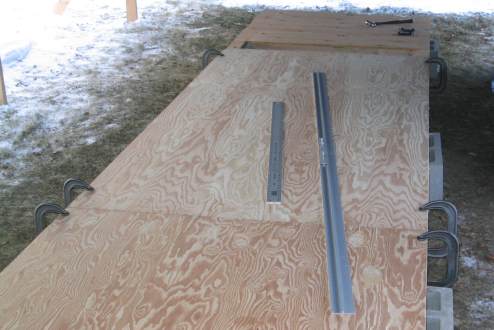
The first step was to clear the tarps protecting the building table and use a push broom to brush off any debris from it. As I carried the two half-inch sheets of plywood to the table, I found that they did not seem to weigh the same. I placed the heavier one (more dense?) in the stern. I placed the "B" side of the panel down, meaning that the more rough side will be on the outside of the boat. I believe that this will give any fiberglass coating a better grip on the wood. And with the sanded or "A" side on the interior and painted, there ought to be less water seepage into the wood. To determine which side is the "B" side, run your bare hand along each side, and from whichever side you get splinters -- that's the "B" side.
Used six brand new 5-inch C-clamps to hold the plywood panels down. I cleaned the contact surfaces of each of oil residue to keep the wood as clean as possible. I did not think of this beforehand, but putting the building table up on cinder blocks allows clearance for the clamps. I checked the plywood panels at the corners with a carpenter's square, and all are square. Draw centerline 21 inches from starboard side. Back piece is 42 inches wide, front is 42 inches initially, tapering to a point in front.
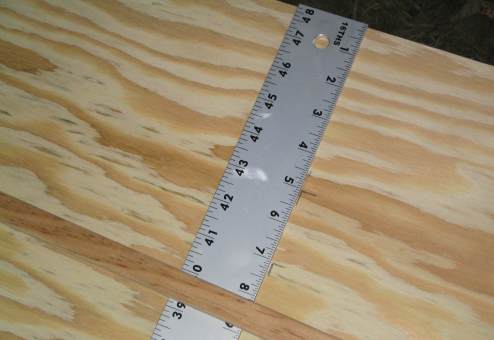
There are many points to plot. However, the right edge line was not drawn according to the plans. I found my error when I did a trial fit with my fairing batten. Instead of 16 inches out on right side, I marked short by 2 inches. Did someone say measure twice, cut once? I plan to be measuring a third time.
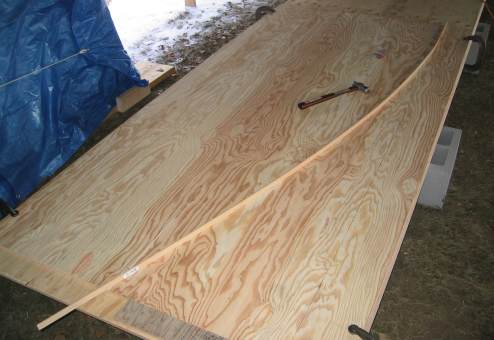
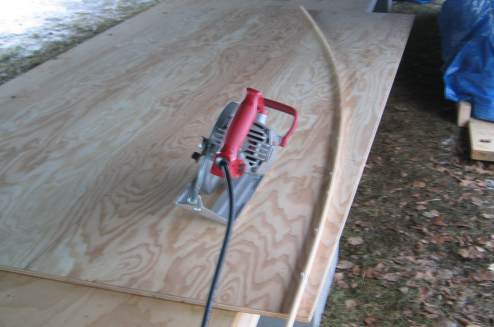
Bought a furring strip about 9-feet long by 1/3 x 1 inch. I used a 1/16 th inch drill bit to make holes one-foot apart down the length of the strip. I put in #16 1 ¼ inch wire brads in the holes to tack the strip at the outline of the points that I drew on the panels. I then drew my lines. I will be moving the strip inward a few inches and attempt to use it as a guide for my circular saw.
I have already drawn the curved lines for the bow bottom section using the fairing baton. I lowered the saw's base plate all the way so that the saws teeth barely protruded. I placed the teeth on the line and moved the fairing baton up against the base plate. I then gave the wire brad a few raps to set the fairing baton in place. I moved the saw up a foot at a time and repeated the process. This gave me the perfect setback from the drawn line, and hopefully, will give me a smooth cut.
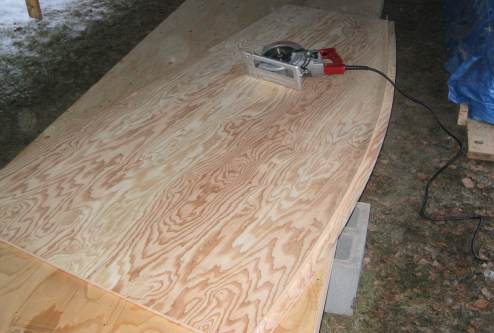
Someone told me that circular saws can't cut curves, but we shall see. I pulled the plywood panel about 10-inches off the building table. The saw blade won't make contact with the plywood panel until it has traveled along the guide about one foot up from the bottom edge.
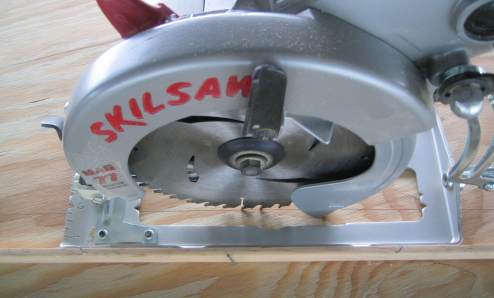
Did both sides-no problems. Set blade depth to shallowest depth so it does not bind as you follow the guide.
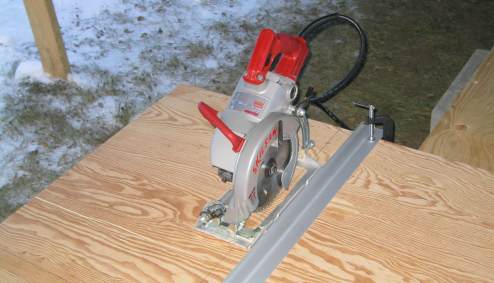
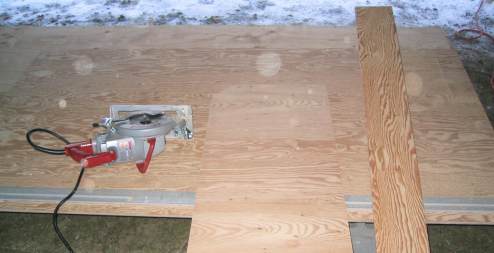
The straight cuts are much easier. First draw the line using the edge-guide to connect the dots from your measurements. Then move the edge-guide in about two inches. Make the cut with the saws base plate sliding against the edge-guide.
I made both straight cuts on the rear panel using the clamped edge guide -- don't need a table saw for these; they went flawlessly. This calls for a celebration with a Dr. Pepper.
Actual picture of me celebrating. You might be wondering what happened to "protecting the innocent from the unscrupulous," since you can see my face. All I can say is, "perhaps I ain't that innocent." Just kidding.
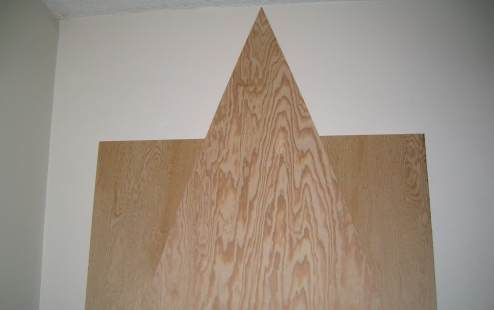
I brought these two finished bottom pieces inside my living room. I am very pleased that I finally got to make a "boat shaped" part for Intrepid. Looks like it's going to be a long, freaking, boat.
|