| The Voyage of INTREPID | |
| "Fairing of the Rear Hull" | |||
|
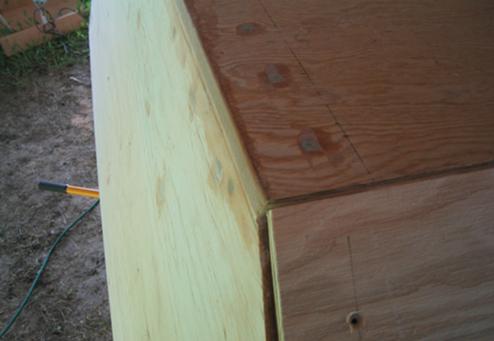
While the hull bottom rests upon the transom and its frame, it is set forward by about 5mm, the same amount seen in that gap on the bilge panel. The reason for this is twofold: the transom sits at greater than a 90-degree angle to the bottom, and we need to create a rounded intersection back there to properly apply the fiberglass joining units. Fiberglass is much stronger when it is applied over a curved surface, rather than over sharp angles. I have filled in the groove between the transom and bottom with epoxy putty, and then shaped and sanded it after it dried. I will do the same with the bilge panels. I will then cover the seams with two layers of 6-ounce fiberglass tape, followed by a layer of 12-ounce.
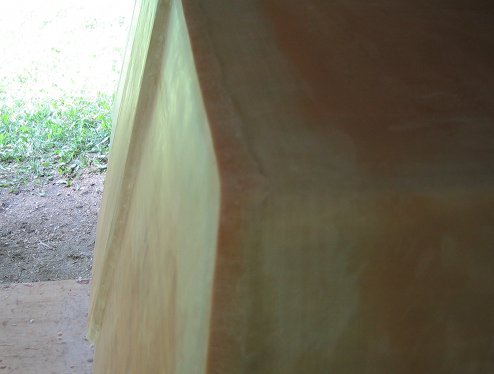
You can see by the gap that the build up of fiberglass on the transom's seams has raised the back end compared to the rest of the flat bottom. A proper planing surface ought to be flat with a sharp break between the bottom and the flow of water leaving it.
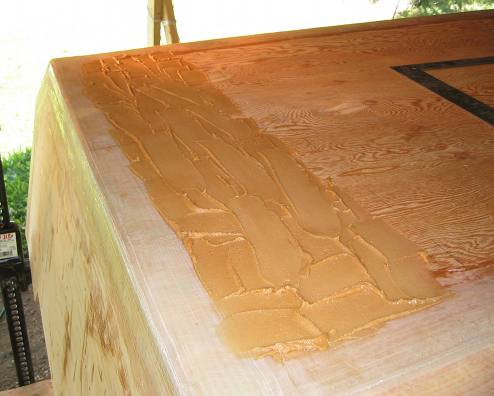
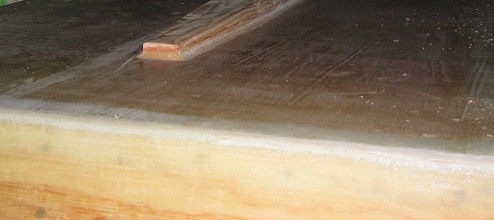
We are going to fill in that hollow with a mixture of epoxy and wood flour. Working with this much paste, I have to work fast before it heats up and goes solid on me. I spread it far enough forward to take out most of the hollow.
I then grabbed a scrap 2 X 2 to use to spread and smooth the paste. One end of the 2 X 2 used the edge of the transom with my pinky out as a guide, and the other end used the boat hull. I was very impressed with results. I sanded any stray high spots, and filled in any pinholes after everything had hardened a bit.
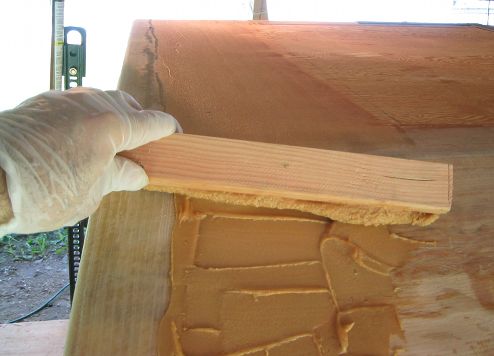
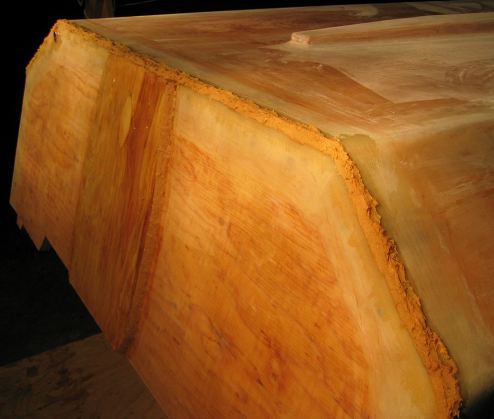
After flattening out the bottom, I covered the hull in 6-ounce fiberglass cloth. The keel went on, and the motor board is about to go on. I have that nice curve there at the junction of the bottom and the transom that is great for the fiberglass tape. But not so good for a planing boat. I have to put that sharp edge back on there.
The solution was to make up a slightly thicker batch of epoxy and wood flour and just clump it on that curved edge. It doesn't matter how you get it on, I used a gloved hand. Just don't go too far beyond the bounds of the surfaces of the boat that lead up to that curved edge.
Once the epoxy began to set up, I began to attack it with each of my wood rasps. It shaped up relatively easily. I am certain this step adds to the performance of this boat.
|