| The Voyage of INTREPID | |
| "Framing the Transom" | |||
|
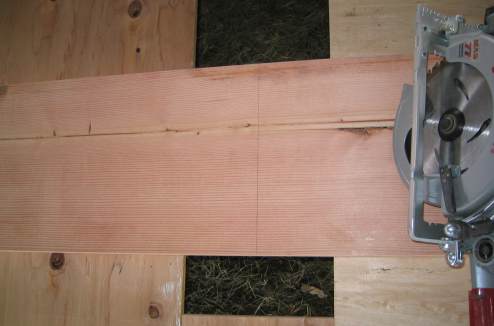
I found what I believe to be a major structural flaw in the design of Dorado's transom as it applies to my requirements. The transom is made up of 3/8ths-inch plywood, framed with essentially 2x4s on the sides and 2x2s on the bilge and bottom. It has a motor board spanning the top width of the transom consisting of a 5-foot long 2x8 from which to hang an outboard motor. I went and measured my Suzuki 25 hp motor and found that the mounting holes were about 11-inches apart vertically, and the entire mounting bracket is about 16-inches long. So, the motor board will not accommodate my motor. Also, the general consensus from two boat dealers (and an inspection of a number of their boats made from different materials), three boat users, one boat builder, and a review of two powerboat plans that I have, suggest that the bottom part of the transom needs to be strengthened. I need to deviate from the plans a bit; I only hope that I do not suffer too great a weight penalty from the needed changes.Note: as I have stated before, my desire is to publish all positive and possibly negative experiences associated with the building of this boat. Just lay it out as it is. I'll be the first to admit that I do not have all the answers, but I will try to find the best solutions to the challenges I come across, both real or perceived. If the designer wishes to comment on any changes I make, I will gladly publish those comments he wants made public on this site as well. I went to the local lumber yard and found two 10-foot long 2x10s that were grade 2, center cut, Douglas fir. At least I am told they are Douglas fir; I haven't seen the wood called hem fir to know the difference yet. I do know that these were beautiful planks with very strait grain and I kind of got excited just handling them. I am starting to look at wood differently--looking at what can be made from what. Anyway, I am going to cut the planks in half; these are going to form my transom.
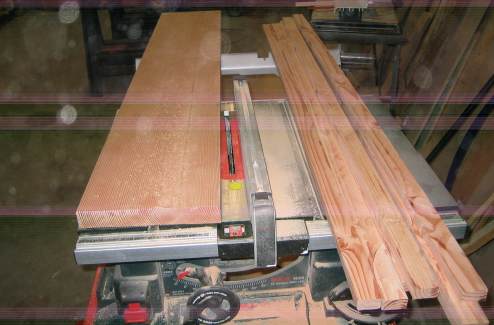
I wanted to frame everything in the boat with fir, but when I saw the price of clear fir already dimensioned, over $2 a board-foot for some of the boards I would need, I started looking for alternatives. I bought an edge guide for my skill saw, thinking that I could "rip" the lumber that I needed inexpensively. Those 10-foot planks only cost $8 each. But then I found out that there is a table saw set up at my workplace, so I decided to try it out just for kicks. I LOVE TABLE SAWS. This saw cut through the board easily, and I made a number of framing strips before cutting the big transom pieces. I thought table saws were relatively dustless devices until I saw the floor on the side opposite of where I was standing. There was an 8-foot by 3-foot swath of sawdust extending out from the table saw that was almost 6-inches deep. Obviously ripping the boards includes macerating, shredding, grinding, chewing up and spitting out the 1/8 blade thickness of wood between the boards. Yup, lots of sawdust. What's up with my camera? I have never seen those lines before. Could be lots of sawdust in the air.
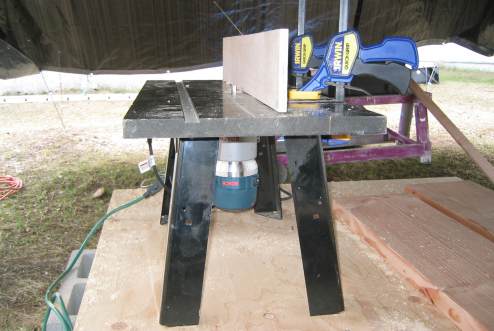
Here is something new. The router is mine, a Bosch fixed and plunge base combo kit, but the table belongs to my neighbor Dave. Brand new tables (good ones)
cost as much as a router does. Thank goodness for neighbors (with tools). Thanks Dave!
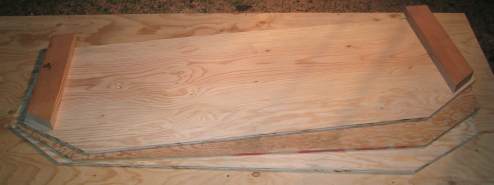
I have observed that some inflatable boats have 1-inch thick plywood transoms that are rated for up to 50-hp. So, here is what I came up with: a 1/2-inch thick piece of plywood to be laminated to each side of the 3/8th-inch transom piece I have already cut out, bringing the total thickness of the transom to 1 and 3/8ths-inches. The original framing in the plans will stay the same. I may add a smaller piece of plywood to block up the position of the outboard later.
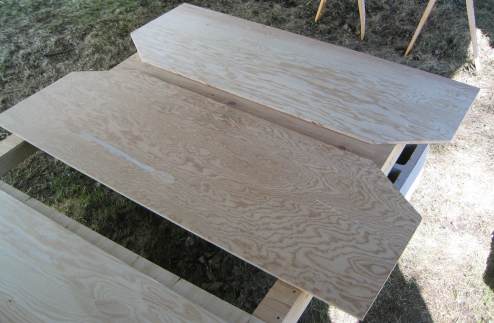
Here you see all three transom pieces at the ready to be laminated. And here is where everything went all wrong. The idea was to paint the epoxy mixture on
each inside face, then mix pine flour into the remaining epoxy to a ketchup-like consistency. This light paste would also be spread upon each inside face to fill any voids, and everything would be clamped together.
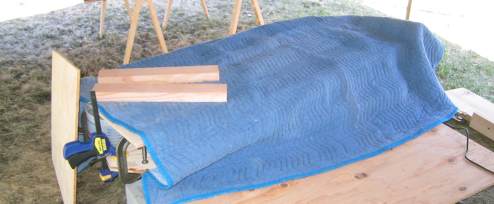
Two pieces of transom are laminated, one more to go. They squished around a bit when I clamped them together, but I got them lined up OK. Three pieces done at the same time would have been more than I would want to handle. I lightly clamped the edges and put weights in the middle.
I should always use the scale, even for the hurry-up batches -- it only takes 30 seconds or so extra time. I had never calibrated the pumps, so my concern
was whether or not I had the right mixture from pumping the quick batch. After some testing, I found that each pump of resin averaged 30.1 grams and each
pump of hardener averaged 28.8 grams, giving me a ratio of 104.5 : 22.01, so what I pumped out yesterday was accurate enough to get the job done.
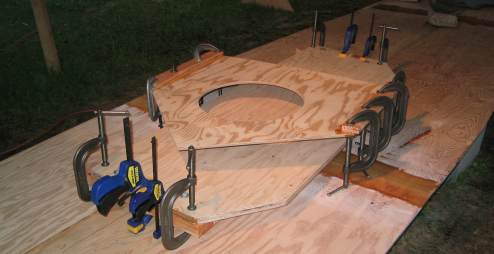
By the time I was done, I had a plank that would not break, even if you drove a Mack Truck over it. Though I was proud of my new transom, every time I picked it up,
I knew it was heavier than I wanted it to be. I decided to take it in to work and weigh it on a real scale -- 40 pounds -- it was at least 10-pounds over weight,
and not in keeping with the lightweight nature of my boat. I decided then and there that I would either have to fix or remake make the transom to be comfortable.
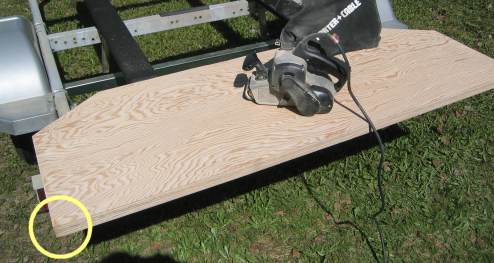
I found a company that had a large 36-inch wide drum sander. For $35 they agreed to sand off 2 ¼ plys from each transom face. They would initially
use 36 grit sandpaper, followed by 80 grit. I think the final result is fantastic. Not only is the transom smoother, but at just a tad under 1-inch in thickness,
it now only weighs 28 pounds.
|