| The Voyage of INTREPID | |
| "Bulkhead 11" | |||
|
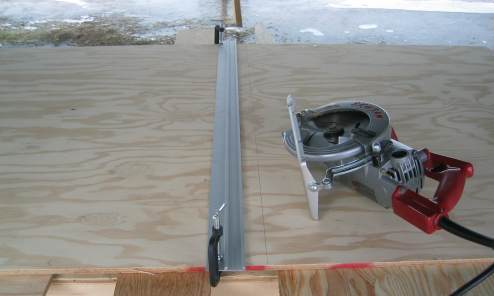
Bulkhead 11 is basically at the middle of the boat, dividing the cabin from the cockpit. Here I am cutting the panel to size. Notice that I have found a better method of cutting long pieces: I support each half of the plywood with scrap plywood to each side of the line I need to cut. Just make sure your saw blade does not protrude more than necessary (1/8th-inch) or you might cut into your building table.
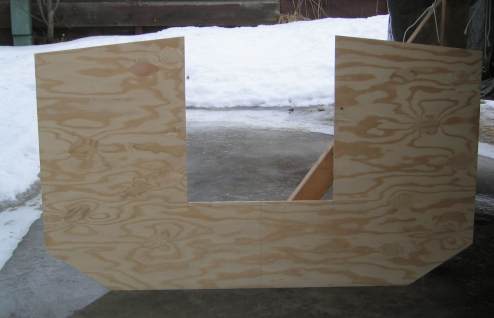
Now this cut was fun, and made me feel like a professional. To cut out the passageway, I tipped the saw up on its nose over the line while holding the blade guard retracted. I slowly lowered the powered saw onto the line, in essence making a plunge cut, and cut as close to the next line as practicable. I finished the cuts with a hand saw. You may notice a second line drawn at the passage sill; that is per the plans at 12-inches. I raised the sill to 12 and a half inches for a little more beef in the bulkhead. I probably should have gone up to 14-inches and added some padding there as well so that someone may sit in the entryway if desired.
Bulkhead 11 cut to its final shape--you can get a real sense of what the shape of the hull is going to be.
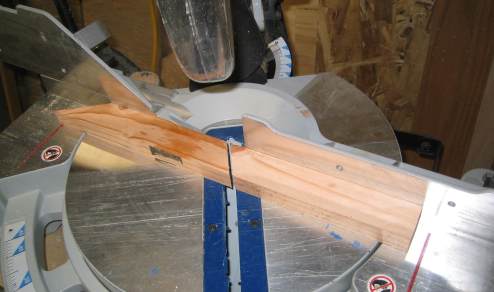
The bulkhead has to be framed out with edge cleats, using 3/4 x 1 ½-inch fir. In addition to a table saw (see Transom), I found out that we have a chop saw at work also. I LOVE CHOP SAWS. When I cut the edge cleats for the temporary forms, my motto was, "close enough." I was using a regular hand saw, and I have a hard time cutting a straight line with one of these. The chop saw, however, is a precision instrument, this one having a laser guide. My cut pieces fit together extremely well.
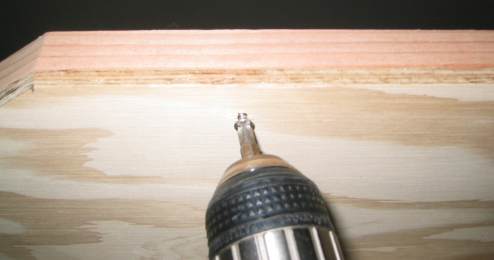
This time pre drilling holes makes sense; I don't want to split the edge cleats.
I gave each edge cleat a liberal coating of epoxy before I place them into position. Then I used 1-inch stainless screws to attach the cleats, just two, or one every 10-inches or so per piece. I used the screwdriver bit to open up the screw-hole a bit, then drove the screws in so the tops of the head were flush with the plywood. You want to compress all layers equally in the plywood.
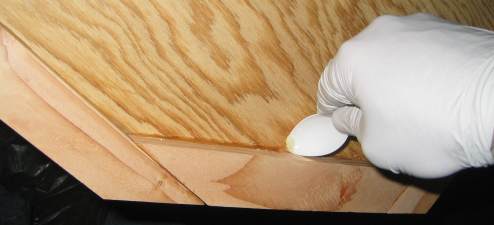
Once everything is screwed together, epoxy should ooze out from the edges. I used a plastic coffee spoon to scrape up the excess. Since epoxy seems to set up much more quickly that the directions state, I actually mixed enough epoxy for half the framing, framed that half, then did the other half.
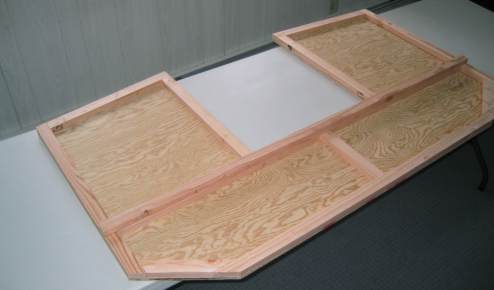
This is the completed Bulkhead 11. I will probably use a round over bit in my router on those inside edges to the edge cleats. Once set up, the bulkhead became a relatively stiff panel.
|