| The Voyage of INTREPID | |
| "Joining Bottom Halves Together" | |||
|
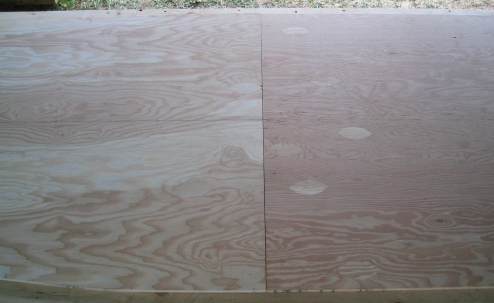
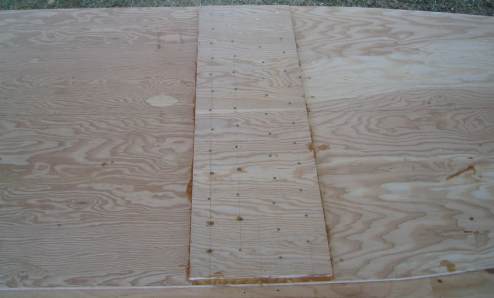
Both front and rear bottom sections are checked for fit and alignment prior to permanently joining them together.
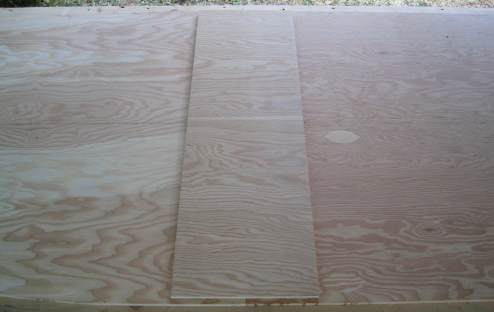
The bottom is ½-inch marine plywood. I am going to butt joint these two halves together using a piece of ½-inch marine plywood on the interior side of the joint and several layers of fiberglass on the exterior side. The plywood-butt side is 12 ½-inches wide, giving a 25:1 ratio. I left a ½-inch gap at both ends of the plywood-butt piece to allow some space for the bilge panels to be mated to the bottom later.
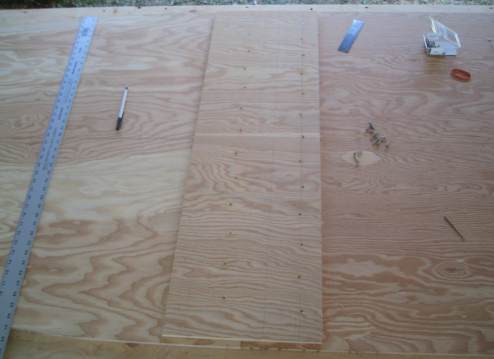
Pre drilling for screws. Two banks were semi-staggered on each half.
Everything ready to go: the butt piece is upside down, screws at the ready, wax paper underneath both bottom halves...then the plan begins to fall apart.
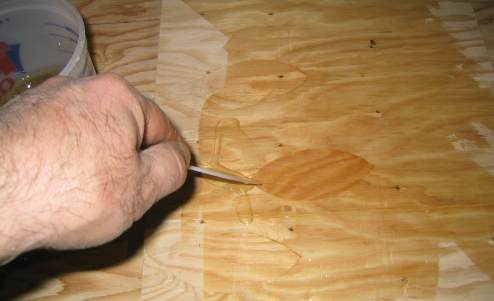
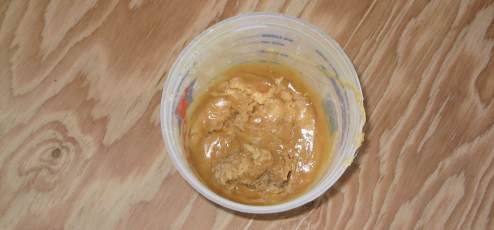
The goal was to first apply a coat of epoxy to the plywood butt and to each bottom half in the vicinity of the joint. I was then going to mix in some wood flour to the left over epoxy to form a paste to put into the joint between both halves. This is to have the effect of a gap-filling structural adhesive.
However, by the time I thought I had enough pine flour mixed in with the leftover epoxy, the container began to get hot. I mean, really hot. It started to get harder and harder to even mix the brown stuff in the container, and then just as suddenly, that brown stuff began to get as hard as a rock. This was my first attempt at mixing in pine flour and I don't think it's supposed to go this way. No epoxy putty went into this butt joint. (Note: I have since learned how to make not only epoxy putty, but also a great epoxy adhesive by adding pine flour to the mixture. For this piece it is too late, but I will be adding two fiberglass strips to each edge of the plywood butt piece for piece of mind.)
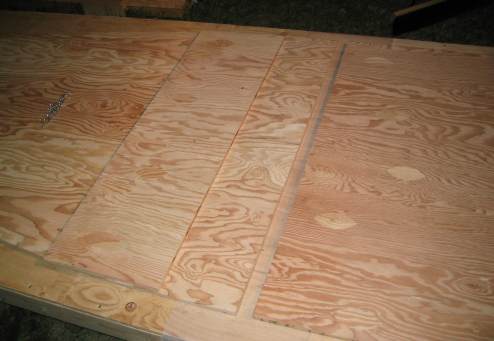
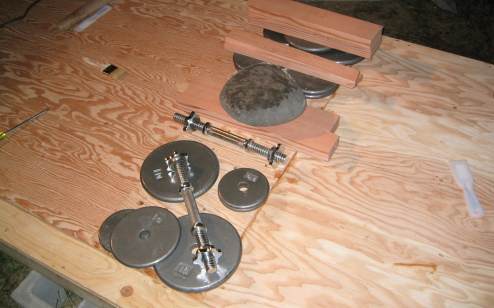
Once everything was screwed and glued, I placed enough weight on top of the butt joint to keep everything flat. This section was put under cover overnight with a small heat source.
Oh. The wax paper that I earlier placed directly under the butt joint was supposed to prevent the freshly epoxied pieces from becoming glued to the building
table beneath them. Well, epoxy sticks to wax paper, at least wet epoxy does. I tried pushing the bottom halves together and the wax paper slid up into the
joint. I pulled one half back, and the paper came out from under the other half. I tried to replace the paper and the wind blew the ends of the wax paper
over onto the top of the epoxied pieces. My time was running out. I just threw out the paper and went, well, paper less.
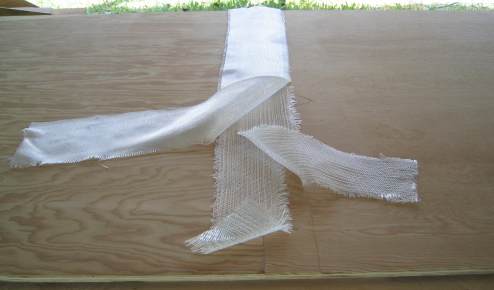
The outside of the butt joint is specified to get two overlapping layers of fiberglass tape. I am using 6-ounce, 4-inch wide biaxial fiberglass strips, to be bedded in epoxy. The term "tape" is actually a misnomer in this description. Each strip is offset from center by an inch and ¼, giving a 2 ½-inch overlap at the joint. I will be adding a third layer, 6-inches wide, but this will be 6-ounce cloth instead.
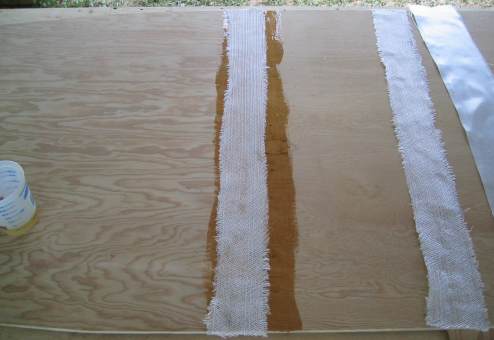
I marked the boundaries (where I wanted the tape to be) and painted on epoxy. The first piece of fiberglass is put into place.
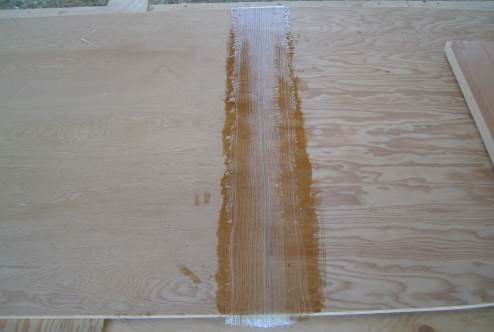
The second piece is applied, and the whole thing gets more epoxy to wet out the fiberglass. The whitish looking area about the center of the joint is where both pieces overlap. I ran out of epoxy mix so the 6-inch wide cloth will be applied at a later time. I used the roller several times back and forth over the fiberglass to make sure the resin was evenly distributed into and about the fiberglass weave. This was left overnight to cure.
(Note: I have upgraded this join in another section to add a layer of 6-inch 12-ounce bidirectional fiberglass tape. After two years of successful use without any issues, I will be upgrading again for my own piece of mind. I will add that section when it is completed in 2011) |